Showing posts with label General Hobby Stuff. Show all posts

Tuesday, March 24, 2015

Adepticon 2015 Afterthoughts (Part 1)

So Adepticon came and went this past weekend.  A change of venue (closer to me, about a 30-45 minute drive from my place vs. over an hour beforehand), a few different venders, and always lots of fun.  I'm not sure if this was my favorite Adepticon as each one I've been to have always been a lot of fun.  I certainly had a blast at this particular one.


So I took a few classes this year.  I tried not to stack my schedule with lots of classes this year as I learned from last year that too many classes tends to take it's toll on you, especially when the Vendor Hall is calling your name.

So for Thursday....


First class up was "Building Gaming Scenery with marcineczek0 – Watchtower Project" run by Marcin who's class I attended last year where I built a little cottage.  I have mixed feelings on this class as it wasn't as good as last years due to it being new for Marcin.  I think if he would have written directions or some kind of packet with the directions on it rather than just telling us the dimensions it would've been a lot clearer as I found the audible directions hard to follow.  At the end of the class I ended up with a wobbly little 5 inch watch tower in desperate need of TLC. Overall, I enjoyed the class and hopefully next year he'll run the class more like he did last year.

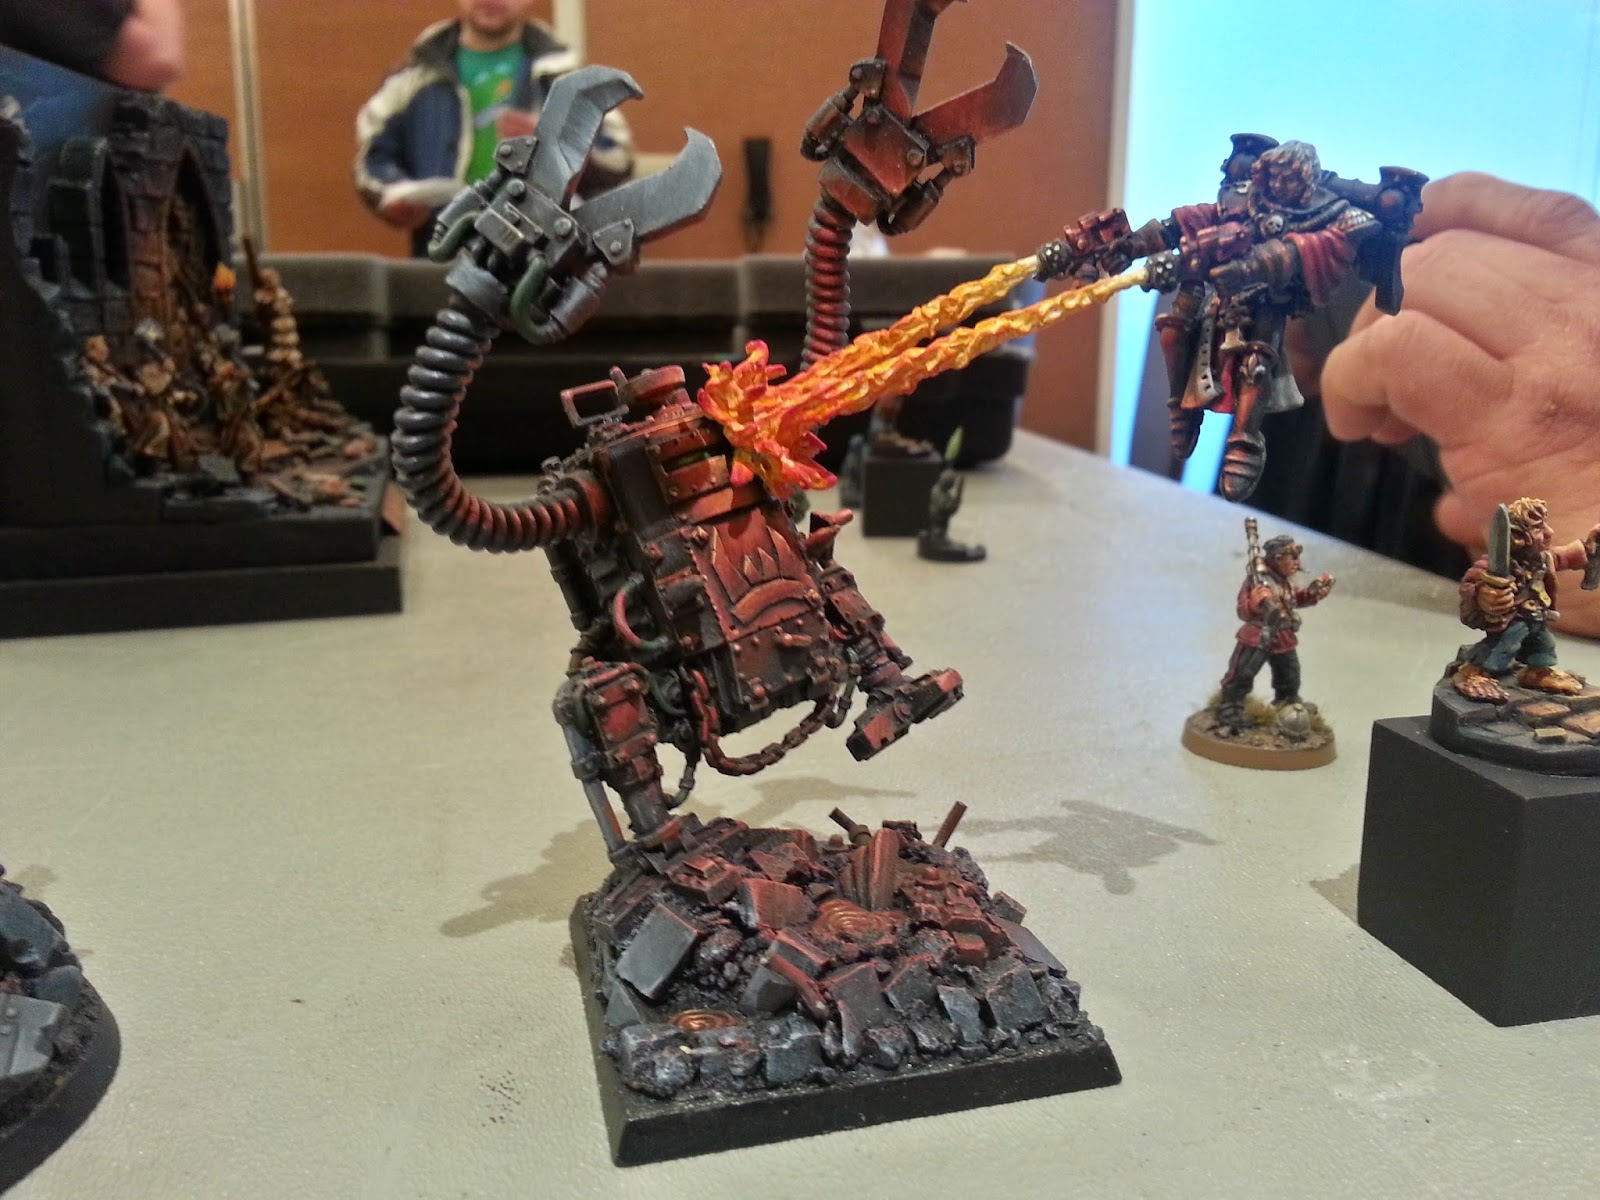
Later that day I took a class called "Painted Weathering Techniques – The Techniques of Plague Lord Festus, 2008 U.S. Slayer Sword Winner".  To be honest, I didn't really know what to expect walking into this class.  I figured we'd learn about weathering powders or a new way to dirty things up with paint taught by a guy who's pretty handy with a brush.  What I ended up walking into was a class being taught by a master painter (Todd Swanson) with something like 14 golden demons and 4 slayer swords under his belt who was ironically a really nice guy who spoke in a language everyone could understand.  Some of his techniques I'd never seen before and he took a lot of care and attention to answer everyone's question and help with whatever problems people were having with his techniques.  He had examples of each step he was teaching, gave hand outs that had photo's of different types of weathering, and passed examples around the room of his finished masterworks.  I mean, look at this model..... it's freakin' awesome...... and a slayer sword winner of 2008..


Friday....


First thing the next day was a class called "Hirst Arts Terrain and Casting" with Rich Nelson.  This was a late edition to my schedule as I think it was added a few months after registration.  I've always been curious about Hirst Arts blocks and I've seen some amazing things done with them.  As it stands right now I just don't have the room to cast really anything in my workspace.  Too messy and small.  One day when I have a huge basement with plenty of space and tables, I would like to dabble more into Hirst Arts, but for now, this class with suffice.  I had a lot of fun casting and creating as it reminded me of playing with legos when I was a kid.  It was a really fun "hands on" class that I would recommend for anyone who is remotely curious about casting and building hirst blocks.


The next class was called "Code Blue: How to Highlight and Shade with Blue Tones", taught by Dennis Smith.  Regardless of it being a beginner class, I found it interesting to see how other people paint.  I've noticed a trend with some of these higher tiered painters that they never use washes and that instead of going from dark to light, they start at a medium tone, shade down they're shadows, then highlight up they're edges.  It's an interesting concept that I've never done before.  I'd consider myself an "intermediate painter" on the skill level chart, but even these beginner classes can teach you something.  The class was small and allowed for a decent amount of personal attention which I think is paramount when teaching painting techniques.  Dennis was also a very down to earth guy and I enjoyed his class.

The last class of the day (and Adepticon for me) was one of the main classes I was looking forward to.  In fact, as soon a registration was open, it was the first class I grabbed from the list.  The class was called "Object Source Lighting (OSL) with Victoria Lamb".  For those who don't know who Victoria Lamb is, she was one of the very first miniature painters who helped pioneer OSL into miniature painting, the first female slayer sword winner, Australian playwright, and owner of Victoria Miniatures (I think, hell her name is on all the boxes).  The first half of the class was lecture style with a projector where Victoria went over the various forms and shades of lighting.  I found it interesting that with her background in theater, was able to pull a tool such as lighting and incorporated it into her painting of miniatures.  The most shocking thing was that her OSL technique involves dry brushing.  The fact that she was able to achieve the blends on the Mordheim piece via dry brushing is jaw dropping.


This has to be one of my favorite pieces in all of miniature painting that I've ever had the pleasure of viewing and is definitely deserving of it's trophies and various awards.  To see it in the flesh was like (to me) meeting your favorite celebrity.  

Here are a few other pieces she had on display for us to see.


Again, all of it was really a treat to see (even the test pieces).  I tried to replicate the fountain piece with the limited color selection available and also showed Victoria some pictures of my Skaven Warplighting cannon I did a few months back where I tried OSL for the first time.  She gave me a few pointers and left the classroom with a wealth of knowledge I hope to utilize in the near future.  A big thumbs up for this class.

Unfortunately my lunch is over now and I got to get back to work.  Part 2 should be up later tonight or tomorrow.

Monday, May 5, 2014

I've done the unthinkable

As the header would suggest, I've done the unthinkable.  I purchased my first (and second) Warhammer Fantasy Battle armies.  I've been struggling with this decision for awhile.  Do I really want to commit that sort of time to a game I might not even like?  Well, after the guy at the discount bits and bobbles place at Adepticon told me all GW was 20% off plus no tax, I was pretty much sold.  So I ended up buying two battalions of Chaos and Skaven, and ended up purchasing a copy of Island of Blood off the second market on ebay for dirt cheap.  Technically, that would be 3 armies.  Needless to say, I'm going to be busy for awhile.

I've spent the past few days clipping, gluing, and smoothing down mold lines.  It's really amazing how long just putting together models and cleaning them up is.  When you do one box of 12 figs, it really isn't that bad.  An hour, maybe 2 if your a perfectionist.  When your doing an entire army comprising of many boxes with numerous bits and pieces, the time really adds up.

Here's a look at the progress I've made...


Not a "gi-normous" army, but pretty well sized.  A box of chaos hounds, a box of chaos knights, a box of forsaken, two boxes of chaos warriors, a box of dragon ogres (my fav thus far), a demon prince, and a few special characters to lead this rag-tag band of misfits.  Will I ever play them or even WFB?  Probably.  If Adepticon taught me anything, its that I need to diversify my tastes in miniature wargaming.  I'm not going to forget of LotR SBG, and I still plan on doing my corsair army sometime this year.  In terms of gaming, I have plenty of armies to play basically any point match that comes my way, so this diversion shouldn't change the plans I still have for SBG.

With all that being said, I think its time to reflect on the other 95% of my hobby.... the painting.  Its funny, because you really don't realize how far you've come as a painter until you do a direct comparison of your work with something from the past.  Its like when you look at yourself in the mirror, and you really don't realize how different you look from 10 years ago.  You look in the mirror daily, and you don't really notice the subtle changes happening day to day until you whip out a picture from years ago.  Then it really becomes evident.  In terms of hobbying, its kind of the same way for me.


I think the above pictures are a good example of what I'm talking about.  On the left is a test figure I did last night to get my color schemes down for my Khorne themed Chaos Army.  On the right is an old Heroquest chaos warrior I painted roughly 3 years ago when I rediscovered my love of this hobby.  You can really see the difference in both model quality on GW's part, and the progression of my own painting abilities.  The figure on the right represents a skill set at the very basic levels.  I understood the core concepts, but actually physically doing them was a challenge.  Only thru hours and hours and countless miniatures did I develop into the painter that I am now.  I'm not a golden demon or crystal brush quality painter, but I'm getting better with every miniature I do.

I think its important to go back and look at work you did when you first started painting.  Nobody starts out as a world class painter.  Only thru actual experience do you progress in skill level.  Sure, after awhile, the progression slows down as you try to master different hard-to-do techniques.  But do yourself a favor, and when your struggling on a project or having problems getting motivated, take a look back and just see how far you've come.  I know from looking at the two mini's in the picture I've come a long way, and still have a long way to go to reach my ultimate painting goals.

Sunday, March 23, 2014

The adepticon 2014 display board

Some of you may have noticed a lack of updates lately (over a month).  No, I haven't died or been indisposed.  After painting a large army to the highest standard you are capable of, sometimes you need to put the brushes down and go do something else for awhile.  Sadly, I don't half ass much in my life when it comes to entertainment or enjoyment, so when I picked up my game pad, I have a hard time putting it down.  For those curious, I completed the following games....

Lord of the Rings: War of the North
Of Orcs and Men
Dragon Age Origins
Dragon Age Awakening
Dragon Age II
Mass Effect
and I'm two chapters into Mass Effect II and itching to complete

alas, with Adepticon being less than 2 weeks away, I needed to complete my display board and hopefully finish my Freeblades Band.  The display board is finished.  Not the prettiest looking thing, but never the less, not bad.  Anyhew, here are some pictures I took during the process.


So to start off, I bought a small 12"x18" cork board from Office Depot for the base of my board.  I didn't feel like making the wood siding out of wood as I lack the tools, motivation, and skill to do so.  So, I let office depot do the work and buy it for dirt cheap.


We need material to make the rock out of, and I don't know any material better than insulation foam.  This particular piece was 1" thick.


After a few minutes of chopping, we got it to a rocky looking.... well.... rock.  It covered most of the board which was the original goal.


Kids, I don't recommend doing this someplace you don't want to get foam shards all over the place.  Anytime you mess with foam, things turn into a mess.


Everyone seems to have they're own formula for adding texture and coating.  I've found that I'm a fan of these materials.  PVA glue, hydrocal, general purpose caulk, water, and generic sand.  It adds a nice texture and seals the foam quite nicely.


After coating it, it should look something like this.  Reminds me of my mom pumpkin slices, minus the granny texture look.  I basically just slop that shit all over it and spread the bigger pieces of sand out, trying to give it a more natural look.


After letting it sit overnight, I undercoated it with generic black paint I got at the local craft store.  I basically do the same thing with any type of terrain piece I'm doing.  You could use black spray paint, but it's like 20 degrees outside, plus I'd rather use it for figures rather than large terrain pieces.


I spent a little time trying to get it to look like the bases of my army.  After failing over and over again, I decided to just base it dark brown, then paint it with shades of gray.  Yeah, I could do better, but this piece isn't going to get alot of use, and its just something the army is going to sit ontop of during Adepticon.

So now onto what some people have been asking for.  Full army pictures.  Note, every figure here has been on the blog before, so there isn't anything new in terms of models....


Take note that this is just my collection of finished dwarves, which total count is almost 70 which is why they appear to be kind of crowded.  My adepticon army is only like 41 models, so they'll be plenty of space.  I hope you enjoyed what you saw.

Sunday, February 9, 2014

The magic of the lightbox

I know I had a question/comment in my comments section last post asking me about my light box.  Rather than explaining what I did in detail, I figured I'd post some pictures of the awesome job I did (note the sarcasm).

Without further delay, I present the worst looking light box ever constructed


As you can see, I'm a master builder here


Instead of making it nice, I opted for masking tape


Yep, that's an old white tshirt taped to the sides


And when I ran out of tshirt parts, I used a paper towel.  Ingenuity my friends.


Regardless to outer appearances, it's whats on the inside that counts


Don't bother asking me for measurements, since I didn't bother to measure.  The odd part is I did a fair bit of research on it one day and I incorporated all the main aspects of a light box that professional people use. 

I opted to go with the quickest and easiest route.  The box was made with regular 4mm foamboard that you can buy at any dollar store.  The white tshirt/paper towels over the light holes kills the harshness of the lights giving a softer glow inside the box.  I used daytime light bulbs because you want white light that doesn't distort the colors of your models.  3 points of entry for the light so your hitting on all sides of whatever your shooting.  I opted for a hole in the front rather than an open front because I wanted as much light as possible to bounce back into the box.  I always thought a white background was boring, so I printed some cool looking mountain and tossed a few trees to give it a natural look.  I also didn't attach the bottom to the box because.... well, I just didn't and have no explanation why.  The lights I got at the local hardware store for like $8 a pop along with the daylight flood lights.  All in all, I'd say around $40-$50 for this little setup, the light fixtures and the lights themselves being the bulk of it. 

If your using my lightbox as a guide... well, lets say I wouldn't if I were you.  There are tons of youtube videos out there with people who actually know what they're talking about to actually get tips from.  As far as mine goes, it looks like shit, but it's effective for what I need it to do.

Wednesday, March 20, 2013

Gloss and Matt Varnishing Miniatures

I have a confession to make.  In the past two years of miniature painting, I have not once sealed any of my miniatures.  I know, I know.... the audacity.  Seriously though, after a few days of research around the interwebz, I've come to the conclusion that they're really isn't a standard method of finishing and sealing.

Now I've used the Army Painter dip method before when I first started out painting trying to save time by having a decent tabletop standard paintjob, but the problem was I wasn't really learning how to paint.  I think the painting in general is the cornerstone of the hobby.  So after I dipped a few miniatures and hit it with the Anti-Shine Matt sealant, I wasn't that happy with the finished product and I ultimately decided the only way I was going to really learn is by actually putting in the time and effort via trial by fire.  Thus two years later, my painting is rather decent and I have a display case filled with various levels of my painting prowess.  With every miniature you paint, you can only get better and I've come to respect that.

Onto the topic at hand.  So I've never once sealed anything I've ever painted.  Playing in last weekends tournament and watching my mini's get thrown this way and that (didn't really notice anything at the time), I packed all my guys up and headed home.  Now I'm not someone who leaves my mini's in the case, as I like to place them back in glass cabinet where I can admire them.  So I'm putting them back in the case, only to notice that on my fresh new Minas Tirith troops, the black paint around my cast bases was flaking off.  Now I wash my bases with soap and water after I cast and then brush prime them with black primer, but this is a problem.

After doing a bit of research, I realized that out of all the tutorials on painting and everything associated with miniatures that I've ever come across, not one tutorial have I ever come across on proper sealing.  Sure, I've heard of different affects you can achieve by gloss varnishing and matt varnishing thru passing, but nothing crazy definitive.

So all over the interwebz, everyone has they're own crazy way of varnishing and sealing.  Some use the cheapo brands from the local DIY hardware stores, others specific model brands, and even others who use 5 different types of glosses and varnishes on from various sources on they're models.  Most swear by they're tryed and true methods while other complain of disasters of the dreaded "misting" effect after using propellant sealant in inadequate conditions.  I took what I had laying around, played with it and took some pictures.


So I decided to go for Games Workshop (old) Gloss Varnish and Army Painter Anti-Shine Dull Matt.  After reading a few places, it seemed the consensus was that a gloss varnish start is the way to go since it has the best protective properties.  After applying it and letting it dry, it gives your miniatures a nice protective coating.  I did a 1:1 ratio of the gloss and water and applied it to a broad cross section of miniatures I own to give this trial a full go.


It's hard to see, but it gives you a really nice hard shell after it dries, but leaves you with a hideous sheen (it is gloss after-all).  After I applied 2-3 coats, I went looking online to find how long I'm supposed to wait for it to fully cure before I hit it with the Matt.  Well, the consensus is still up in the air on that, so I decided to let them sit over night and hit them after work the next day.  And I did just that.... 


I have to say, I really like the flat Matt look on the mini's.  It really gives them that finished/professional look.  Now the down side is it does mute your darker colors depending on how much you apply, but I think that's one of those things you can control with experience.  Here are two examples of the difference between just a paint job and my new method with the gloss and matt side by side.

Same exact mini, one on the left was just painted, one on the right was painted and sealed using gloss/matt
Same scenario as above picture

Take note that each model in the set was painted around the same time as its duplicate using the same techniques on both miniatures, so its not like one is painted better than the other.  When you twirl the mini's on the left side, the parts that aren't supposed to be shiny (like cloth/skin) definitely have a glare on them, while on the right, the only slight glare you get is from the metal parts and even that is extremely limited (which is the effect of what I'm after).  In the first picture you can definitely see it while in the second picture, its more subtle.  You be the judge.

All in all I like this method and I'm planning on incorporating this into my regular painting routine.  The down side is that its time consuming.  Two layers of watered down gloss, a night to cure, then 2-3 sessions of Flat Matt before you can even place static grass or any tufts.  I guess I'm just used to finishing painting, tossing a little glue on the base, sprinkle a little grass here and there and maybe a tuft or two, then tossing it in the case.  Also worth note is the fact that I'd like all my miniatures done this way, which means I have multiple armies to do as well as various touch ups that I always tell myself I'm going to get to someday.  Well, I guess someday is here.

Friday, March 1, 2013

Scavaging

After my last blog, I was going to immediately return to my Men of Minas Tirith to finished the original 40 some odd guys I had left to paint, but unfortunately that didn't happen.  Instead, after peering into the 3 odd containers filled with simple green, I knew what I had to do.

For those of you who are scratching your heads, I have a confession to make.  I buy tons of miniatures on ebay with an extremely poor paint job for dirt cheap.  I strip them off paint using simple green, then paint them up to the best of my abilities.  Some people will only use this method with pewter/metal.  Unfortunately, I'm extremely cheap and will even do plastic.  Also, being the lazy ass that I am, I usually dump a lot of 50 of them in a batch of simple green and forget about them for months on end.  Anyway, here's the latest.....

Yup, there is about 100 mini's in there, including metal trolls and camels


I think I ended up pulling 50 warriors of rohan from this tub


and here is a few of them cleaned as best as possible

And in one of the cheap lots I bought included a Mumak (giagantic elephant) which I proceded to rip apart and strip.


So I spent about 3 nights stripping paint off and I'm happy to report that I have officially stripped everything that needed to be stripped.  Also on a side note, the King of the Dead finally arrived which I was able to promptly paint in under an hour.

Yay!!!! I don't have to use an unpainted Warrior of the Dead as a proxy anymore